


Blogging is a powerful method for brands and businesses to connect with their audience, showcase expertise, and drive traffic. In this article, let's look at how you can create a blog on WordPress and how to collaborate, publish, analyze, and optimize the content.
WordPress stands out as a top choice for blogging, offering advantages that even legacy open-source platforms like Drupal can't match. This has led various businesses and enterprises to migrate from Drupal to WordPress to capitalize on these benefits.
Additionally, content management solutions offer a streamlined way to schedule, manage, publish, and analyze WordPress drafts, making your blogging journey even more efficient.
Table of contents
1. How to Create a Blog on WordPress
Before you get ready to write your first blog post, you need to complete four straightforward steps that will get your platform ready.
1. Setting up a WordPress Account
Creating and activating your WordPress account can be done in six easy steps:
- Click 'Get Started': Head over to WordPress.com. On the homepage, you'll find a 'Get Started' button. Clicking this will take you to the signup page.
- Provide email and username: You'll need to enter your email address and choose a username. The email is for communication between you and WordPress, while the username is what you'll use to log into your blog.
- Choose a blog address: WordPress will suggest a blog address based on your username, but feel free to choose something unique. Remember, this will be the URL of your blog.
- Set a strong password: You'll be prompted to create a password. Make it strong but memorable. WordPress even gives you a strength indicator to help you out.
- Select a free suffix: You'll have the option to choose a suffix for your blog address. For starters, you can go with the free option and upgrade later if needed. Then click on ‘Create Blog’.
- Activate your account: After creating your blog, you'll receive an activation link via email. Clicking this will activate your account and take you to your new WordPress dashboard.
2. Choosing a Domain and Hosting
A domain is essentially your blog's address on the internet, like "YourBlogName.com." Hosting, on the other hand, is the service that stores your blog's data and makes it accessible online.
Think of it as the land where your blog's "house" (domain) sits.
When selecting a domain, aim for something easy to remember, and spell, and is relevant to your brand or the blog's content.
For hosting, consider factors like uptime, customer service, and the types of services offered. If your blog is going to be image or video-heavy, you'll need a hosting service that can handle that kind of bandwidth.
Some popular and reliable hosting service providers for WordPress bloggers include:
- Bluehost: Known for excellent customer service and great uptime.
- HostGator: Offers a range of inexpensive plans, with lots of features.
- SiteGround: Offers solid performance and excellent customer support.
- WP Engine: A bit pricier, but offers robust features tailored for WordPress blogs.
3. Selecting a Theme
Your WordPress theme is more than your blog’s aesthetic appearance that goes beyond the fonts, colors, and layouts. Here are some key factors you must consider while selecting a theme for your WordPress blog:
- User experience: A theme should be intuitive, easy to navigate, and make your content pop.
- SEO-friendly: Some themes are better coded for SEO than others.
- Customization: Look for themes that allow you to tweak the layout and design.
- Speed: A lightweight theme will load faster, improving user experience and SEO.
- Responsiveness: Ensure the theme looks good on all devices.
To help you set up your WordPress blog quicker, here are some theme suggestions you might want to consider:
- Divi: Known for its complete design control and deep WooCommerce integration.
- Astra: Incredibly lightweight with a full customization library.
- OceanWP: Offers RTL language support and a demo theme gallery.
So, take your time and choose a theme that aligns with your brand and makes your content shine.
4. Customizing your blog’s appearance
WordPress is a playground for customization, offering a plethora of options to make your blog truly your own. From simple color changes to intricate layout designs, the sky's the limit.
However, before you get carried away and make undesirable changes or spend too much time thinking about what to change, here are a few pointers you need to keep in mind:
- Color Scheme: Choose colors that align with your brand and are easy on the eyes.
- Typography: Font style and size can greatly affect the readability of your blog.
- Header and Footer: These areas are prime real estate for additional navigation and branding.
- Widgets: Use these for extra functionality like social media feeds or a search bar.
- Images and Media: Ensure they are high-quality and relevant to your content.
- Navigation: Make it intuitive. Your readers shouldn’t struggle to find what they’re looking for.
After learning how to create a blog on WordPress, let's move on to content creation.
2. Content Creation on WordPress
Creating compelling content is the heart of any blog. Let's dive into how you can make the most out of WordPress for your content creation needs.
1. Writing your first blog post
WordPress’ intuitive backend makes it easy even for non-technical users to get used to the platform within minutes.
- Create a new post: Log into your WordPress dashboard and navigate to the 'Posts' tab. Click on 'Add New' to start crafting your post.
- Title and Body: The first box is where you'll enter the title of your post. Below that, you'll find a larger box for the body content. This is where your main text, images, and other elements will go.

- Formatting Tools: WordPress offers various formatting tools like bold, italic, and paragraph alignment to enhance your post.
If you are using the Gutenberg Editor, your experience will be even more seamless as it is a block-based content editor where you can create templates, import custom blocks, etc.
2. Adding multimedia content (images, videos)
Multimedia content such as images, videos, infographics, interactive blocks, etc., make your blog post more engaging. WordPress editors, whether classic or Gutenberg, make it easy for authors to include these components.

3. Organizing content with categories and tags
On the right side of the post editor, you'll find options for categories and tags. Categories are broader, while tags are more specific. For instance, if you're writing a cake recipe, your category might be 'Baking' and your tags could be 'cake', 'birthday', and 'icing'.

The tags and categories help your blog readers browse through your content and find articles related to a broad topic they are interested in.
4. Creating SEO-friendly content
Using the right keywords while writing and adding a concise meta description before publishing greatly increases your search engine visibility.
Keywords are basically what your readers might enter into the search engine while looking for the kind of information you have on your website. And meta descriptions are short summaries of your blog article which will be visible to internet users when they see your content on the search results.
5. Scheduling and publishing blog posts
Before making your post live, you can preview it to see how it will appear on your site. Once you're satisfied, hit the 'Publish' button.
It is also essential to plan when you want to publish your content. For instance, you might want to write all your posts at once for the month and want to publish them once a week.
Don't let disorganization and missed deadlines hold you back. Bring content creation, collaboration, optimization, planning and scheduling together into one tool. Start planning your content today.
3. Manage, analyze, and optimize WordPress content
As a content marketer, you know how challenging it can be to manage multiple content types and collaborate with others. That's where StoryChief comes in.
This indispensable tool offers powerful analytics, in-app SEO guidance, and AI writing assistance to streamline your workflow. With StoryChief, you can easily boost your social media reach and keep track of progress with its integrated calendar and app.
Pairing WordPress with StoryChief is a game-changer, empowering you to go beyond basic publishing and truly optimize your content for success.
How StoryChief Complements WordPress
iProv faced a common problem of inefficiency in content management as their remote team struggled with multiple versions in Google Docs and a lack of SEO optimization. Their non-technical team members faced difficulties with WordPress as it required expertise.
Then they discovered StoryChief, the all-in-one content marketing platform that became the go-to source for their marketing efforts.
StoryChief offers a plethora of features that seamlessly integrate with WordPress to elevate your blogging game. Here's how:
- Content Calendar Management: StoryChief provides a content calendar that helps you plan and schedule your posts. This is a game-changer for maintaining a consistent posting schedule.
- Collaborating with a Team on Content: If you're working with a team, StoryChief's collaboration features make it easy to get everyone on the same page. You can comment, make revisions, and even have approval flows to streamline the content creation process.
- Workflow and Approval Processes: The platform allows you to set up approval flows, ensuring that the content meets quality and branding guidelines before it's published.
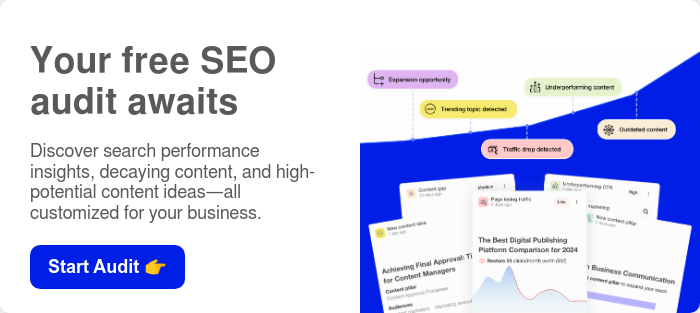
- SEO Optimization: You can leverage the SEO assistant that provides actionable and easy-to-apply tips, helping you to attract more visitors.
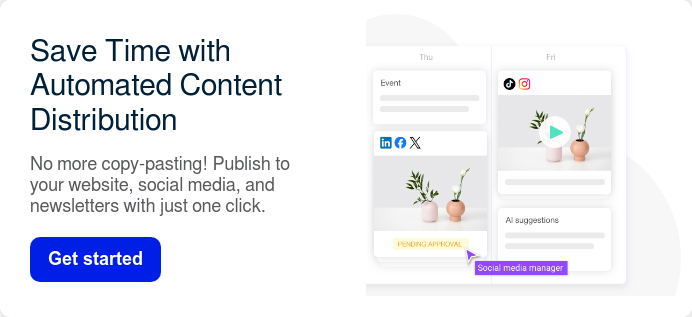
- Social Media Management: Promoting your WordPress blog‘s posts on social media effectively and measuring your performance over time can be easily done from StoryChief.
- Automating Content Distribution: StoryChief allows you to publish your content to multiple platforms, including Google My Business and Facebook Instant Articles, with a single click.
- Analyzing the Performance of Your Content: Real-time analytics are available to help you understand what types of content resonate with your audience.
- Managing Multiple WordPress Sites: If you have more than one WordPress site, StoryChief lets you manage them all from one place.
Connecting your WordPress blog to StoryChief
To sync your WordPress blog with StoryChief, here's what you need to do.
1. Head to Channels: Open your StoryChief dashboard and find the 'Channels' option. Click it and then select 'WordPress'.


2. Add New Destination: Click on 'Add New Destination' to initiate the setup. Keep this page open.

3. Plugin Time: Jump over to your WordPress admin area and add the StoryChief plugin to your site.

4. Personalize Settings: Once the plugin is installed, go to your WordPress settings and find the StoryChief tab.

5. Key Swap: Back in StoryChief, you'll see a unique key. Copy it and paste it into the WordPress StoryChief settings.


6. URL Exchange: Now, grab the WordPress URL from the StoryChief settings on your WordPress site and paste it back into StoryChief.
7. Lock it In: Hit save on both platforms. A success message should pop up, confirming you're all set.

This way, you've got a seamless link between your WordPress blog and StoryChief, making your content management a breeze.
Conclusion: Creating and Managing your WordPress Blog Efficiently
Apart from writing quality content on their WordPress blog, brands also need to appropriately promote their posts on various platforms to ensure maximum reach and engagement.
StoryChief helps do that by offering a centralized content calendar, team collaboration features, and even SEO optimization tools.
StoryChief eliminates the need for various tools by bringing SEO, writing, reviewing, publishing, and promotion together in one beautiful platform. Start your free plan now!